Finished.
My wife and I picked up the new cabinets from
Ikea in the Chicago suburbs on July 1st. I erroneously thought I could assemble and install the cabinets within one week.
Boy, was I wrong. I didn't plan on painting the entire room or replacing the carpet when I made the premature prediction.
Those upgrades ultimately stretched the timeline out about ten more days than I planned. I'm okay with that though.
We moved in during the summer of 2008 and the man room has pretty much been the same the past decade, save a few modest updates along the way, like a
homemade TV stand,
coffee table or a
bat rack.
I figured if I was going to do a full tear down, then I better build it back up the right way.
With that in mind I pulled out some graph paper and made a scale model of the room. For reference, each square is four inches by inches, with the before on the left and the after on the right.
As a geometry teacher, who spends an entire chapter on ratios, proportions & scale factors during the school year, I was pretty psyched about this part. Yes, I'm a math nerd, but playing with the furniture pieces, while adding and subtracting others, helped me to envision the final product.
As you can see Hugo was a big help with the production.
Once I had a game plan the fun started.
I had three cantilevered shelves in the room and one of them had affixed itself to the wall. When I finally pried it from the wall, well, some of the wall came with it.
It was only a minor set back, as I'm fairly adept at dealing with drywall and drywall repair.
So, here's where the man room stood at this point.
Thank goodness there was room in the workshop and hallway to temporarily store all my junk! The last things to go were my couch, the coffee (sorting table) and the TV.
Next step was to pull up the baseboard, the carpet, and remove the tack strips that bordered the entire room.
Super helpful cats!
In the picture above you're looking at a concrete floor and you'll notice the bottom three inches of the drywall is missing. When we had water in the basement I never thought about mold growing behind the baseboard. Black mold is no bueno. So I cut out the drywall and filled it in with some spare wood scraps I had lying around. I purchased a taller baseboard to cover things up so it didn't have to be too fancy.
Paint. I'm not a fan of painting. I hate cutting in, but I'm good at it because I'm probably a little too meticulous.
Regardless, I took a small shelf to one of the big box hardware stores and had them match the color. Above, the cats are inspecting my handwork as I started to assemble the shelving units and cabinets.
I decided to go with carpet squares over traditional carpet.
First, it's a basement, so it's not like it has to be Grade A carpet material. Secondly, we have cats and have had water in the basement once already. We've made corrections so the water shouldn't be an issue going forward, but hairballs are going to hairball. Picking up a tile and washing it off is such a convenience.
Here's a picture of Hugo holding down the first four carpet tiles. He probably deserves a raise.
Holiday on the other hand just likes to be in the way. All. The. Time. Guess what I needed at that particular moment. Whoever guessed "another carpet tile" would be a winner!
I laid about two thirds of the tiles in one afternoon, but boy were my knees sore.
Knocking out the last third, which all had to be cut, took twice as long. Please, take note of Holiday laying on the carpet tile pile again.
Once the carpet tiles were in I was able to install the new baseboard and connect the cabinets and shelves to the wall.
Did I mention earlier that I changed out all the electrical sockets and light switches to bright white? No? Well, I did that a few days earlier.
That brings us up to this past Monday.
I spent Monday afternoon playing with ceiling tiles so the entertainment system could be on the other half of the room. I should really invest in a soundbar or some wireless speakers, which would have saved so much time. But, I'm kind of partial to my old school sound system and all of its wired speakers.
Finally, the fun part! I spent yesterday and today, when time allowed, moving everything back into the man room.
Below is the view from the door to the hallway.
What you see above are four of the five storage units I purchased. Below is the fifth and it's place on a separate wall between the doorway and the electrical box to the house.
The cabinet above holds an abundance of my Chicago Cubs and Peoria Chiefs memorabilia.
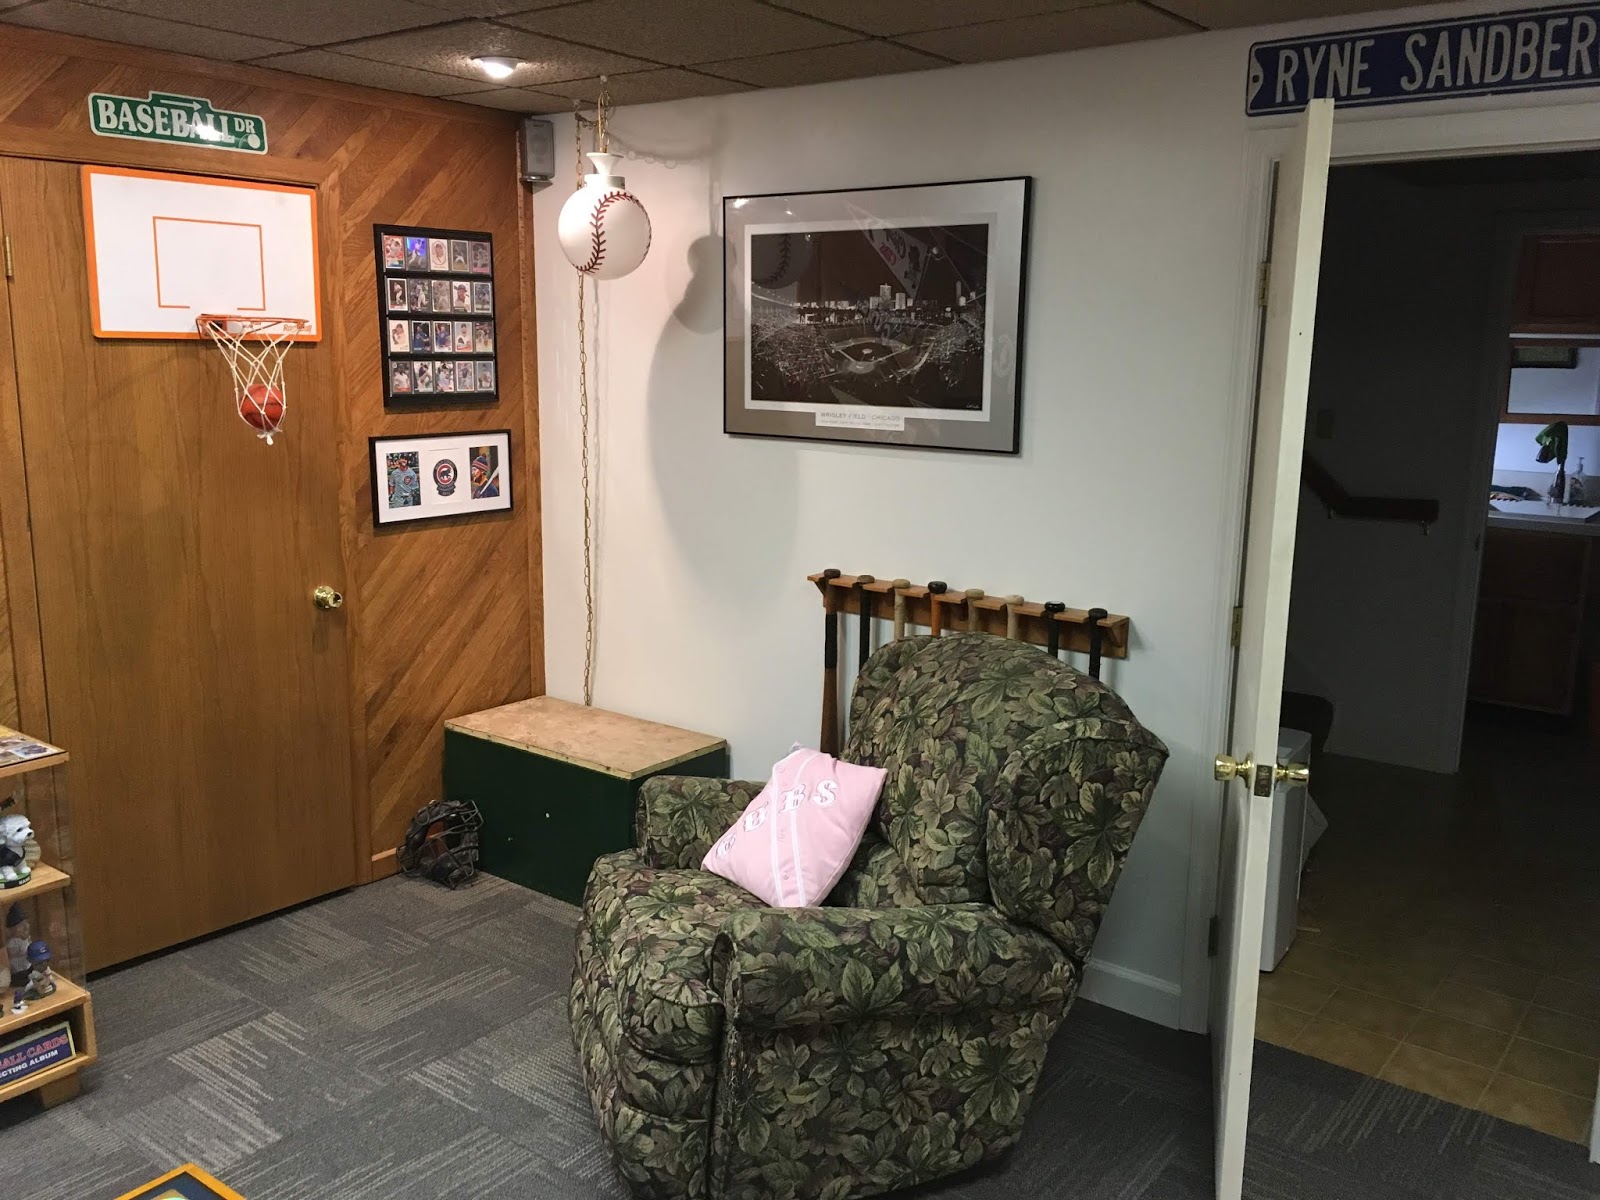
Here's a view of the doorway.
My homemade bat rack and the toy chest (filled with complete sets of the baseball cards) in the corner are the only two objects that wound up returning to their original pre-remodeling locations.
The card closet and entertainment system. For what it's worth, I have quite a bit more space in the card closet now thanks to the new cabinets. Woo-Hoo!
As we keep moving around the room we can see a couple of my favorite wall hangings, my homemade coffee (baseball card) table and my little window.
The furniture will be the last change, as it doesn't really go with the room. All in good time... or maybe not at all!
Below is another shot of the cabinets and book cases.
And here they are up close:
The lower portions are filled will old pictures, posters and pennants... and wait for it... baseball cards! I plan on rotating things on the wall in the future. The bobbleheads, which are seen on the left, are finally allowed to space out some. I have one bobblehead for each MLB stadium I've been to. (Actually, I still need to purchase one for Oakland and Philly.)
So, that'll put the wraps on my big summer project. I'm very happy with how things turned out and I can't wait to start sorting some cards tomorrow and maybe watch a movie.
Thanks for taking a tour with me!


That was a fun tour! I see one of those 20-card wall hanger display cases there, I've had three of those on my wall for as long as I can remember and I keep all my most treasured vintage cards in them. They're excellent additions to any card room, I think.
ReplyDeleteThe one you spotted is filled with a roster of cards from the 2016 Cubs!
DeleteGreat work and that was one hilarious post. I just remodeled my hobby room/office and didn't think to document to effort. I had help from our cat as well. When she got in the way I assigned her to timeout.
ReplyDeleteI bet she loved being in timeout as much as she loved being in the way. Ha!
DeleteEpic!!
ReplyDeleteGreat job Tom! Your remodeled card cave looks amazing.
ReplyDeleteLooks fantastic!
ReplyDeleteYour room is awesome! When I was in middle school one of my elective teachers taught us how to do scale modeling and our task was to design a house. It was one of the coolest projects ever. If I ever move into a larger place, I'm looking forward to designing my office/card room.
ReplyDeleteLooks great. Congrats on a job well done!
ReplyDeleteLove it. Very well done
ReplyDeleteThat looks great! Way to go!
ReplyDeleteIt looks incredible! I'm so jealous and wish I had a place like this to hang out. Well done, Coach.
ReplyDeleteVery nice work!
ReplyDeleteHoliday almost blends into the carpet haha...nice job with your room and thanks for the pics!
ReplyDeleteOh, she blends in alright. I've already locked her in the man room, because she's the EXACT colors of the carpet. Poor planning on my part!
DeleteWow, Tom! That's looks like a great place to sort some cards and watch a game! I wish I was more handy.
ReplyDeleteI love love love the touch of Ivy and may just have to steal that idea!